
 The first step is arranging a design consultation in your home. You will meet with Diane (The Chief Magician) who has over 30 years of experience. She will discuss the elements that are important to you; your privacy concerns, style, architectural features, color and quantity of light. In most cases Diane will draw a sketch combining those elements you discuss. She will also have a collection of photos and images of past work to help generate ideas for you and to show differences in how the final design or modifications might appear in your home. Your dream glass has already been loaded into the Magician’s wand (pencil), the magic is getting it to come out on paper. This is why the Magician often uses both ends of the wand in order to get the magic right.
On sight measurements will be made to insure a proper fit and templates will be made for any window or door that is not a square or rectangle. Should the window or door have mullions (raised grids or grids between the glass) accurate measurements will be taken to insure that the final design will overlay the mullions and not detract from the overall design.
The first step is arranging a design consultation in your home. You will meet with Diane (The Chief Magician) who has over 30 years of experience. She will discuss the elements that are important to you; your privacy concerns, style, architectural features, color and quantity of light. In most cases Diane will draw a sketch combining those elements you discuss. She will also have a collection of photos and images of past work to help generate ideas for you and to show differences in how the final design or modifications might appear in your home. Your dream glass has already been loaded into the Magician’s wand (pencil), the magic is getting it to come out on paper. This is why the Magician often uses both ends of the wand in order to get the magic right.
On sight measurements will be made to insure a proper fit and templates will be made for any window or door that is not a square or rectangle. Should the window or door have mullions (raised grids or grids between the glass) accurate measurements will be taken to insure that the final design will overlay the mullions and not detract from the overall design.
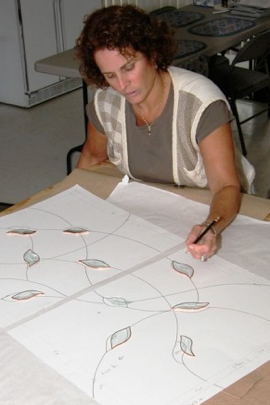 The Magic takes its first breath when Diane returns to the Studio and makes a full scale drawing of the window or door with the ideas generated during the home consultation. It will show every glass piece and identify the border, background and central design elements or bevel clusters that are to be used. Color or stained glass will be identified and glass samples of optional colors will be sent to you along with her recommendation. The drawings can be hung in place at your home so that you can “live” with the design or bring in family and friends for comments. Once you are satisfied with the drawings (with or without modification) you will give Diane permission to proceed to manufacture the glass, where the lines of graphite are transformed into hot lead and glass.
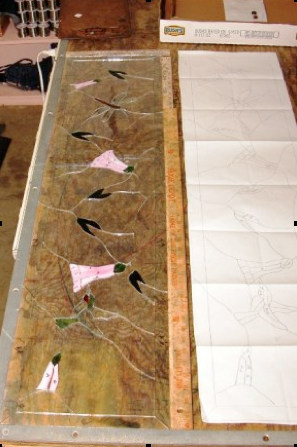
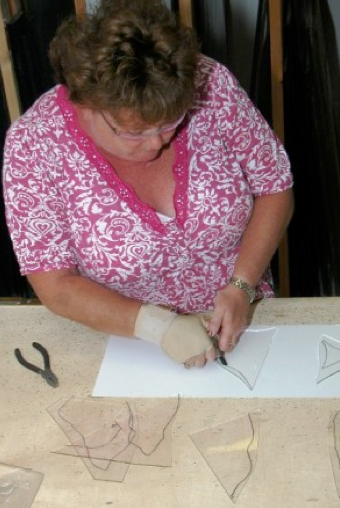 When making any potion, the ingredients are key, before stirring and heat are applied. A poster board copy of the approved drawing is made. Each piece of glass in the design is identified by its shape, type of glass that is to be used and the direction of the grain. Each shape is cut from the poster board and placed on the glass that is to be used in the pattern. The glass cutter must be certain the pattern piece is properly placed on the glass to insure that the grain of the glass will match the final design. The shape is traced onto the glass and then hand cut by the glass cutter. The glass shape is then moved to a custom frame which has been built to match the dimensions and shape of your glass. Like a jigsaw puzzle, piece after piece is traced, cut and placed into the frame until the design is completed and now comes to life in glass.
 In order for the glass to be soldered (held together with melted lead/tin), the design process perimeter of each piece of glass must first be wrapped in a copper foil tape. (The copper foil was Tiffany’s innovation to traditional lead caming and allows for small design details.) Again, each piece must be wrapped by hand and returned to the frame in its designated place in the design. When completed, final adjustments are made to insure proper alignment and the integrity of the design. Depending on the design, additional reinforcement would be added at this point to strengthen the structure from bowing or sagging.
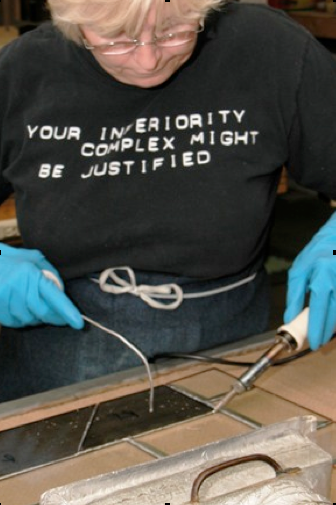
Soldering is the “fairy dust “which holds each piece to the next. It transforms the delicate pencil lines of the Artist into permanent metal lines of the design. Imagine drawing with two hands, rather than one and you will have some appreciation what our solder must do. In one hand you have a hot iron with temperatures exceeding 800 degrees, while in the other hand you have metal wire which you are constantly feeding onto the tip of the iron. As the metal (lead/tin) melts and flows from the iron, you must follow the copper joints of each piece of glass being very careful not to add to much metal or too little. The finished joint should be smooth and uniform if done well and with little evidence of stopping and starting.
 Lead caming is added to the perimeter and attached with solder where each line of the design intersects. This will be the frame which provides the backbone of support for the finished piece.
When completed on one side, then the half-completed work is delicately turned over so that the same process can be accomplished on the back. What was once hundreds of pieces of glass have now become a solid singular glass.
The window or door is washed/scrubbed on both sides, to remove the grit and solvents used in soldering. This prepares the lead to receive patina which is most often dark. The patina advances the natural aging of lead and slows further oxidation of the metal. Again the window is rinsed to neutralize the patina and left to dry.
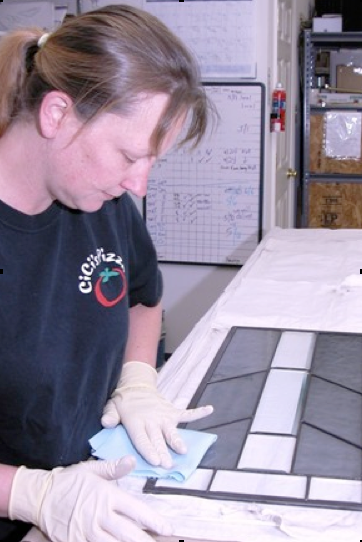 The window or door is taken to a cleaning station, where hours will be spent, under bright lights to remove, dirt, grease, grime, patina, solder balls and anything else that may have gotten onto the glass. Razor blades, sharpened picks, micro fiber cloths, commercial glass cleaner and paper towels are used in bulk as each square inch of glass is inspected and cleaned on both sides. When finished, the lead lines are polished and sealed, along with the glass.
The final piece is prepared for installation, which includes adding adhesive on the back side and protective coating on the front. Pieces are marked as to their final location and orientation on your glass. It is carefully wrapped in cardboard and sealed waiting for the installation or shipping.